| Custom stamp making out of dollar store erasers and carving tools. We used an ink pad to print our custom stamps. Directions: 1) Trim erasers into square, and trace size on white copy paper. 2) Draw image on white paper with a regular number 2 pencil. Then put pencil side down on top of eraser and use the end of a sharpie and rub image onto eraser. 3) Students then need to decide which lines to carve. Talk about positive and negative space. 4) Talk about carving safety and your expectations. This is extremely important and be very clear and follow through with consequences so everyone is safe. 4) I brought small groups to a table with me, while others worked on a individual project to keep them busy. 5) If they were not working quietly their table was not called up to carve. I was then able to assist and make sure everyone was using tools appropriately. This tool about three days to complete, but well worth it! Students loved this project and did great. Most importantly NOT ONE bandaid was used for 145 middle schoolers. | 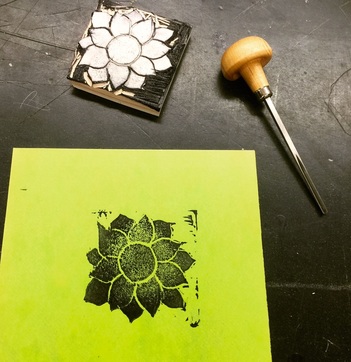 |
|
0 Comments
Your comment will be posted after it is approved.
Leave a Reply. |

Mrs. GobleI live and teach Art in Tracy, CA. I have the pleasure of teaching 650+ students 1st-8th. I am a busy teaching, going to school in the evenings to get my Masters in Visual Performing Arts, mom of two high school kids, and have had many foster children that have come into our hearts and home. I have been married for over 20+ years. I have been an Art Docent for over three years for Special Education classes 4th-8th. I love being creative in all areas of my life, and wanted to have a space to share all of the fun I have with my students everyday. Categories
All
Archives
August 2018
To donate money for supplies click here:
Creative Art Room Supplies at gofundme.com |
 RSS Feed
